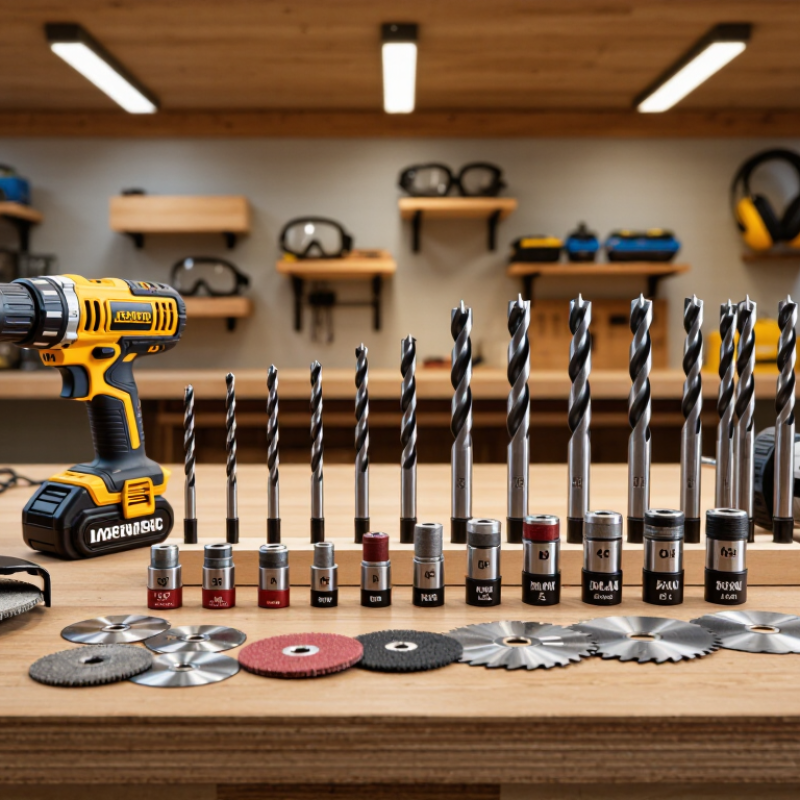
Choosing the right Power Tool Accessories in 2026 requires more than comparing prices or following popular brands. A drill bit that performs well in softwood may overheat quickly in stainless steel. A cutting disc designed for masonry can become dangerous when used on metal. The material, tool speed, workload, and connection system must work together.
Kenny Koehler, a veteran power-tool reviewer and former Pro Tool Reviews editor, offers a practical principle: “Performance starts with matching the accessory to the material, not the brand name.” That advice remains valuable as cordless platforms become faster and more specialized. Before buying, check the accessory’s shank type, diameter, maximum RPM, battery platform, and manufacturer ratings. Small details matter. A loose fit can create vibration, rough cuts, or premature wear.
Real workshop experience also challenges neat buying guides. I have chosen impressive-looking accessories before, assuming a higher price guaranteed better results. That assumption was wrong. Some premium bits lasted longer, while others offered little improvement for occasional repairs. The sensible choice depends on frequency, material, and required precision. Safety should remain part of the decision, not an afterthought. Inspect discs for damage, use proper guards, and wear suitable eye and hearing protection. In 2026, smart accessories may include tracking features, improved coatings, and low-dust designs. Still, technology cannot correct poor compatibility or careless handling. This guide examines those practical differences, including where product claims deserve closer questioning.
Choosing a power tool accessory starts with the job, not the tool drawer. Identify the material, cut, hole, or surface treatment required. Wood needs accessories with clean cutting edges and controlled chip removal. Masonry requires impact-rated bits designed for dense, abrasive surfaces. Metal often demands sharper geometry, suitable hardness, and steady speed control. A drill bit is not automatically suitable for every drilling task.
Tips: Check the accessory rating, shank size, and recommended speed before fitting it. Match the accessory to the tool’s function, such as drilling, driving, sanding, or cutting. Test on a scrap piece first. Watch for heat, vibration, and uneven edges. These details often reveal a poor match early.
Experienced users also inspect the workpiece before choosing an accessory. Hidden nails, hardened knots, and thin sheet metal can change the safest option. Use eye protection and keep both hands positioned securely when the tool design allows it. I still occasionally choose a faster accessory and regret it when the finish becomes rough. Speed is not always efficiency. A slower pass with the correct accessory usually produces better control and less wear. Check the tool manual when specifications are unclear, because similar-looking accessories may behave very differently.
Choosing power tool accessories in 2026 starts with fit, not appearance. A bright coating cannot correct a mismatched shank. Measure the tool’s chuck, arbor, or spindle before ordering. Compare hex, round, SDS-type, and threaded connections carefully. Even small differences can cause wobbling, heat, or sudden release.
The Freedonia Group’s 2024 power tools analysis identifies replacement and accessory demand as a major part of mature tool markets. That trend makes compatibility checks more important. Match diameter, length, thread pitch, and maximum rated speed. Check whether the accessory needs a locking collar or a specific washer. A 6.35-millimeter hex shank will not safely replace every 6-millimeter design. It may appear to fit. That is the problem.
IEC 62841-1:2014 sets general safety requirements for many hand-held and transportable motor-operated tools. It addresses construction, protection, markings, and operating safety. It does not turn an incompatible accessory into a compliant one. Read the tool manual and accessory markings together. Confirm torque limits, rotation direction, guard requirements, and dust-control provisions. The European Commission’s 2023 Safety Gate report recorded more than 3,400 product alerts, showing how frequently product safety concerns reach regulators. I still recheck measurements manually, because catalogue data can be incomplete. A thread gauge, caliper, and trial fit with the power disconnected are simple safeguards.
| Accessory Type | Typical Tool Interface | Common Sizes or Dimensions | Fit Verification | Speed, Load, or Capacity Check | IEC 62841-Related Safety Consideration |
|---|---|---|---|---|---|
| Twist Drill Bits | Round shank held by a chuck | Shank diameters commonly range from about 1 mm to 13 mm; larger tools may accept approximately 16 mm or more. | Confirm that the bit shank does not exceed the chuck capacity. Check whether the chuck accepts round shanks only and tighten all jaws evenly. | Do not exceed the bit’s recommended drilling material, diameter, or tool torque. Use reduced speed for larger diameters and hard materials. | Use a guarded, correctly functioning tool with the appropriate auxiliary handle where required. Secure the workpiece and avoid loose clothing or rotating contact hazards. |
| Hex-Shank Driver Bits | 1/4 in hex quick-change holder or chuck | Most insert driver bits use a 1/4 in hex shank. Longer power bits may use a 1/4 in hex power shank with a retaining groove. | Verify the holder accepts the bit profile and locking groove. The bit must seat fully and lock without excessive radial play. | Check the bit’s impact rating before use in an impact driver. Use torque-compatible bits for high-load fastening. | Use accessories suitable for the tool’s operating mode. Inspect the bit and holder for cracks, deformation, or poor retention before operation. |
| Masonry Bits | Round shank, hex shank, or SDS-type shank | Round and hex shanks are commonly available up to approximately 13 mm for general drills. SDS-plus systems use a nominal 10 mm shank body with longitudinal driving grooves; SDS-max systems are larger and are not interchangeable. | Match the shank system exactly. Do not insert an SDS accessory into a standard chuck unless a specifically approved adapter is provided. | Confirm hammer-mode compatibility, maximum drilling diameter, and recommended material. Use a dust-extraction method where practical. | Hammer tools can generate high vibration and ejected debris. Use the prescribed side handle, eye protection, and any tool-specific vibration-control instructions. |
| Hole Saw and Arbor | Arbor with pilot drill and threaded hole-saw connection | Hole-saw diameters commonly range from about 19 mm to 152 mm or more. Arbor threads and pilot-drill systems vary by design. | Confirm the arbor thread matches the hole saw and that the pilot drill is securely retained. Check the drill chuck capacity for the arbor shank. | Large hole saws require lower speed and higher torque than small saws. Verify the maximum diameter permitted by the drill and arbor. | Use the auxiliary handle when the tool manual requires it. Prevent snagging and kickback by using the recommended speed and maintaining firm two-handed control. |
| Angle-Grinder Abrasive Disc | Spindle with clamping flange and nut | Common disc outside diameters include 115 mm, 125 mm, 150 mm, 180 mm, and 230 mm. Bore sizes commonly include 22.23 mm and 25.4 mm, depending on the disc system. | Match disc diameter, bore, thickness, flange arrangement, and disc type to the grinder. Never enlarge the bore or use damaged flanges. | Disc maximum rated speed must be equal to or greater than the grinder’s no-load speed. Cutting discs are not designed for side grinding unless specifically rated. | Use the correct guard, side handle, and flange orientation. The disc must be suitable for cutting, grinding, or other stated operations. Follow the tool manual and the disc’s safety instructions. |
| Diamond Cutting Disc | Angle-grinder or tile-saw spindle and flange system | Common outside diameters include 115 mm, 125 mm, 180 mm, and 230 mm; a 22.23 mm bore is common for many hand-held grinders. | Verify the disc is intended for the material and for dry or wet cutting as specified. Check bore, thickness, direction marking, and guard clearance. | Do not exceed the marked maximum speed. Continuous-rim, segmented, and turbo-rim designs have different cutting behavior and application limits. | Use only with a compatible guard and dust-control or water-feed arrangement where specified. Do not use a diamond cutting disc for operations outside its stated purpose. |
| Reciprocating Saw Blade | Universal reciprocating-saw blade tang | Many blades use a standardized single-lug tang, while blade lengths commonly range from about 150 mm to 300 mm or more. | Confirm the tang enters the clamp fully and locks securely. Check blade length, exposed stroke clearance, and tooth direction. | Match tooth pitch and blade thickness to wood, metal, plastic, or demolition work. Avoid bending the blade during a cut. | Keep the blade guard or shoe positioned as instructed. Use the shoe against the workpiece where applicable and wait for the blade to stop before setting down the tool. |
| Jigsaw Blade | Jigsaw blade clamp | Common tang formats include T-shank and U-shank designs. Blade lengths often fall between approximately 75 mm and 150 mm. | Match the tang profile to the clamp and confirm that the blade is locked. Check whether the saw accepts only one tang format. | Choose tooth pitch and blade material for the workpiece. Ensure the cutting depth exceeds the material thickness without contacting the shoe or work surface improperly. | Use the shoe correctly and keep hands away from the cutting line. Select a blade and operating mode suitable for the material and tool design. |
| Oscillating Multi-Tool Blade | Tool-specific or slotted oscillating interface | Interfaces may use open or closed slots, star-shaped drives, or other proprietary mechanical patterns; there is no single universal fit. | Compare the mounting pattern, slot geometry, screw or lever clamp, and blade offset. Do not assume visual similarity means compatibility. | Check the permitted oscillation angle, accessory width, cutting depth, and recommended material. Use lower pressure to prevent overheating. | Install the blade with the clamp fully engaged. Keep the accessory clear of hidden electrical cables, pipes, and structural fasteners before cutting. |
| Router Bit | Collet matching the bit shank | Common shank diameters include 6 mm, 8 mm, 12 mm, and 1/4 in, depending on the tool and market. Metric and inch shanks are not interchangeable. | The bit shank must match the collet exactly. Insert the shank to the recommended depth without bottoming out, and tighten the collet with the specified procedure. | Bit maximum speed must meet or exceed the router’s selected speed. Large-diameter bits generally require lower speed and controlled feed rate. | Use the router base, guard, extraction system, and auxiliary handles as specified. Do not use a bit with damaged carbide, excessive runout, or an unsuitable cutting profile. |
| Impact Socket | Square drive on an impact wrench or driver adapter | Common square-drive sizes include 1/4 in, 3/8 in, 1/2 in, 3/4 in, and 1 in. Drive size must match the tool or approved adapter. | Use impact-rated sockets with the correct square drive and retention hole or ring where required. Do not use ordinary chrome-plated hand sockets on impact tools. | Check the socket’s torque rating, fastener size, and tool output. Use the correct six-point profile for high-load or seized fasteners. | Use eye protection and maintain a secure stance. Inspect sockets, adapters, and retaining rings for cracks, distortion, and wear before use. |
| Sanding Disc or Pad | Backing pad, hook-and-loop pad, or threaded spindle | Common sanding diameters include 115 mm, 125 mm, and 150 mm. Disc holes and backing-pad interfaces vary by tool type. | Match disc diameter, hole pattern, attachment method, and backing-pad rating. Ensure the abrasive is centered and fully attached. | Use the abrasive within its maximum speed and intended grit range. Excessive pressure can overload the motor and damage the backing pad. | Use the required guard or shroud and dust extraction where applicable. Avoid worn pads, torn discs, and unsupported abrasive edges. |
| Wire Wheel or Cup Brush | Threaded spindle or arbor with retaining nut | Common threaded formats include M14 and 5/8-11, but thread compatibility depends on the tool spindle and region. Brush diameters commonly range from about 50 mm to 125 mm. | Match spindle thread, rotation direction, brush diameter, and mounting face. The brush must seat flat without thread interference. | Brush maximum rated speed must be equal to or greater than the tool speed. Use the lightest pressure that achieves the required cleaning action. | Wire strands can eject during use. Use the correct guard where provided, eye and face protection, gloves suitable for the task, and a safe working distance. |

Performance data should guide accessory selection, not packaging claims. Check the tool’s working RPM and compare it with the accessory’s rated maximum speed. A close match matters. An accessory designed for lower RPM may overheat or wear quickly at higher speeds. I also check torque requirements, especially for thick wood, masonry, or dense metal. High RPM can look impressive, but it may collapse when the tool meets resistance.
Cutting speed depends on more than motor speed. Disc diameter, tooth shape, material hardness, and feed pressure all change the result. A larger disc can create higher edge speed at the same RPM. That may improve cutting, but it can also increase heat and vibration. Watch the cut, not only the display. Bluish metal, burning wood, or slow chip removal suggests poor settings or a mismatched accessory.
Load capacity deserves equal attention. Confirm the rated side load, drilling depth, impact resistance, or maximum material thickness when available. I prefer testing on scrap material first, using light pressure and short passes. Measure progress, heat, and vibration. My earlier mistake was choosing the fastest accessory and assuming it would finish sooner. It often produced rougher edges and more cleanup. Data helps, but real material can still challenge neat specifications.
Choosing power tool accessories in 2026 should begin with safety, not speed or price. For abrasive wheels, use ANSI B7.1 guidance when selecting, mounting, inspecting, and guarding the wheel. Check the wheel’s size, rated speed, and intended material before installation. Never exceed the accessory’s maximum revolutions per minute. Inspect for cracks, chips, or damaged packaging. A small defect can become a serious failure at high speed. Use the correct guard, flange, and tool setting. Compatibility is not always obvious.
Noise deserves equal attention. OSHA identifies 85 dBA as the action level for an eight-hour time-weighted average. Measure exposure near the operator’s ear, especially during grinding, cutting, or drilling. Short tasks can still create harmful daily exposure when repeated. Wear suitable hearing protection, and maintain it properly. I have seen workers protect their eyes carefully while ignoring noise because discomfort appears later. That judgment is understandable, but it is not reliable.
Tips: Keep a simple inspection record for frequently used accessories. Replace uncertain parts instead of testing them “one more time.” Rotate noisy tasks when practical, and keep doors or barriers between workers and loud operations. If measured exposure approaches 85 dBA, review the tool, accessory, duration, and protection together. Recheck after changing a wheel or work process. Safety decisions should be based on measured conditions, not assumptions.
How to Choose Power Tool Accessories in 2026?
Accessory value is not measured by purchase price alone. In field use, I record cuts, drilled holes, operating hours, and replacement dates. This simple log often exposes a cheap accessory that fails twice as fast. Service life matters.
Efficiency also changes the real cost. The U.S. Department of Energy reports that compressed-air leaks can waste 20% to 30% of compressor output. For pneumatic accessories, inspect fittings, hoses, and seals before blaming the tool. A tighter connection can reduce wasted energy and downtime. Small details matter.
Warranty terms deserve equal attention. Check coverage length, proof-of-purchase rules, exclusions, and replacement procedures. A long warranty means little if shipping delays stop a job. Compare the total cost per working hour, not only the receipt. The 2024 Global Power Tools Market report by Fortune Business Insights projects continued market growth, but market expansion does not guarantee better durability. That is where buyers must remain skeptical. Some performance claims still need independent testing.
Choose accessories that match the material, tool speed, and workload. Professional standards and manufacturer test data should support those claims. I would also test one unit before buying in volume. It is less exciting, but more reliable. Personally, I have sometimes overvalued a low price and regretted it. That mistake is worth tracking.
2026 value comparison using service life, cutting or drilling efficiency, warranty coverage, and purchase cost.
Higher scores indicate better overall value. The value score is calculated from service life, efficiency, warranty, and cost after normalizing each measure within the comparison. Figures are practical planning benchmarks for standard professional-use accessories and may vary with material, tool power, operating speed, and maintenance.