
Choosing a 180 Degree Concealed Hinge is not just about achieving a wide opening. The hinge must also suit the door, frame, and space around them. Check the door’s thickness, weight, material, and overlay before comparing models. A hinge rated for a 180-degree opening may not reach that angle in every installation. Nearby walls, handles, and cabinet sides can restrict its travel. Small detail, big consequence.
Look for clear manufacturer specifications, including load capacity, mounting dimensions, adjustment range, and recommended screw type. For a heavy door, confirm whether the stated capacity applies to one hinge or a pair. Also check whether the hinge supports the door’s actual construction, such as solid wood or a framed panel. It is tempting to focus only on the 180-degree label; that can be a mistake. Measure the opening and note any obstructions before ordering. If possible, compare the technical drawing with the real installation area.
Installation quality matters, too. Accurate drilling and secure fixing help the door move smoothly and stay aligned. Some models offer three-way adjustment, which can make small corrections easier after fitting. Still, adjustment cannot compensate for the wrong hinge size or weak mounting points. Product descriptions may leave out details that matter for unusual doors, so consult the manufacturer when specifications are unclear. The best choice balances opening clearance, load support, durability, and a clean appearance. A careful measurement now may prevent a door that catches later.
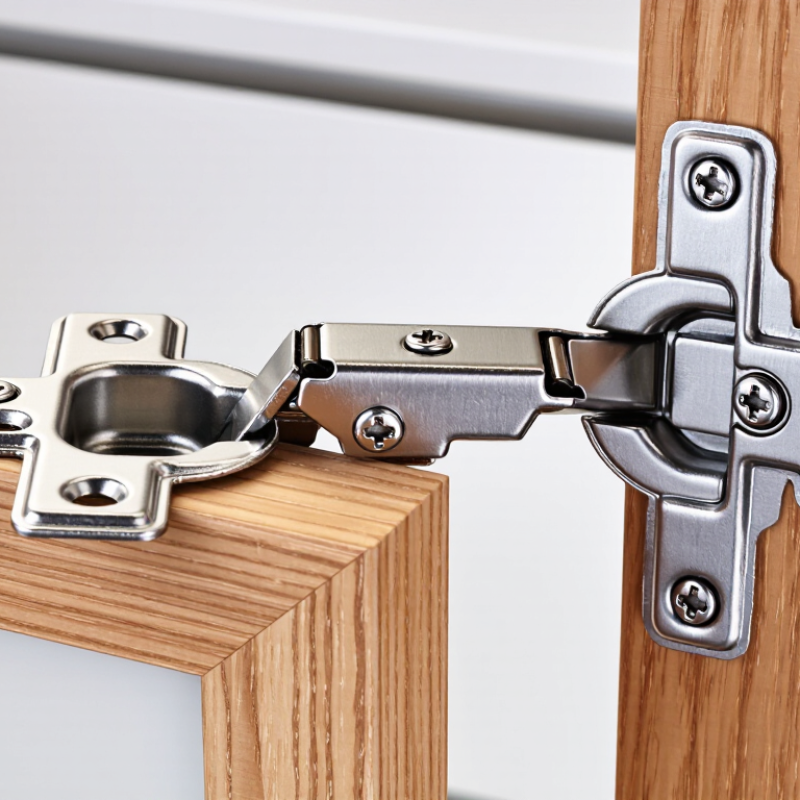
A 180-degree concealed hinge uses linked metal arms to move a cabinet door away from its closed position. The hinge is hidden when the door is shut, often with part of its mechanism seated in a circular cup in the door. As the door swings, the arms guide its path and help it open widely beside the cabinet. Small detail. The advertised angle describes travel, not necessarily a completely clear opening. Door thickness, frame style, and side-panel position can limit clearance.
That geometry matters in kitchens and storage units where doors should not block nearby drawers or walkways. The Houzz 2024 U.S. Kitchen Trends Study reports that 76% of renovating homeowners upgraded their cabinets, showing how often cabinet fit and function enter renovation decisions. For a real installation, check the hinge’s stated overlay, cup dimensions, mounting depth, and required clearance against the cabinet drawing. ANSI/BHMA A156.9 provides performance requirements and test methods for cabinet hardware, but it does not make every hinge with a 180-degree rating behave identically. A paper angle is useful; a cardboard mock-up of the door swing may reveal more. I would still verify the clearance on the actual cabinet, because a few millimeters can change the result.
A 180-degree opening is useful only when the door clears nearby walls, drawers, and handles. Measure the finished door’s height, width, and thickness, then weigh it with its actual panel and hardware. Do not estimate from the face material alone. A solid-wood door and a lightweight composite door can look similar but load hinges differently. The USDA Forest Products Laboratory’s Wood Handbook (FPL-GTR-282, 2021) lists basic specific gravity around 0.35 for some softwoods and roughly 0.60–0.70 for oak. These figures show why wood species affects mass; they are not finished-door weight ratings. Check the hinge maker’s load chart against door size and hinge count.
Cabinet construction matters just as much. Confirm whether the cabinet is frameless or has a face frame, and check that the hinge cup and mounting plate fit the available material. A heavy door needs sound screw-holding material, not just a stronger hinge. Particleboard edges, thin panels, and worn screw holes can undermine a secure mounting. ANSI/BHMA A156.9 covers cabinet hardware performance, so look for tested load and cycle information rather than relying on the 180-degree label alone. This check is easy to skip. I would also test the full swing with a sample door or template; nearby trim can steal the clearance the drawing promised.
For a 180-degree concealed hinge, material affects corrosion resistance, stiffness, and long-term alignment. Stainless steel suits humid kitchens and utility rooms, while zinc-alloy hinges can work well in dry, lighter-duty cabinets. Look beyond the material label. Check the finish, pivot construction, and screw-hole reinforcement too.
Load ratings need careful reading. ANSI/BHMA A156.9-2020 is an industry performance standard covering cabinet-hardware strength and durability, but it does not provide one universal kilogram rating for every hinge. Compare the rating with the actual door weight and size, and confirm whether the figure applies per hinge or per pair. A tall, wide door places extra leverage on the top hinge. Small detail. Big difference.
Adjustment range matters after installation. Many concealed hinges offer side, height, and depth adjustment, helping correct uneven gaps without redrilling. For a 180-degree opening, verify that the cabinet side, adjacent door, and handle do not obstruct the swing. I would not trust a catalog number alone; test the hinge on a sample door when possible. A slight adjustment can fix a visible gap, but it cannot compensate for an overloaded or poorly supported door.
How to Choose a 180 Degree Concealed Hinge?
Checking Opening Clearance and Mounting Requirements
A hinge rated for 180 degrees does not guarantee a clear, full swing in every cabinet. The door, frame, nearby wall, and handle all affect its path. Measure the space beside the cabinet, then mark the door’s outer edge as it opens. A cardboard door template can reveal collisions before you drill. Simple, but useful.
Check whether the door is inset, partially overlaying, or fully overlaying the cabinet. These mounting styles need different hinge geometry. Measure the door and frame thickness, and confirm the required cup diameter, drilling depth, and screw positions against the hinge specifications. Even a small mismatch can leave the door proud or bind it against the frame. That detail is easy to miss.
Also check the hinge’s load capacity and the recommended number of hinges for your door’s size and weight. A tall, solid door may need more support than a light panel. Confirm that the mounting surface is flat and strong enough for the screws. Before final installation, fit one hinge and test the swing slowly. Watch the handle and door edge near the wall. I have found that measuring twice still does not catch every obstacle; an actual test often exposes one.
| Selection Check | What to Measure or Confirm | Practical Guidance |
|---|---|---|
| Rated opening angle | Confirm the hinge’s stated maximum opening angle and the required usable angle. | A “180 degree” rating describes the hinge’s intended opening range; the installed door may stop earlier if it contacts the cabinet, wall, handle, or adjacent door. |
| Opening clearance | Check the door’s swept path from closed to fully open, including its outer edge and handle. | Measure against nearby walls, appliances, drawers, trim, and neighboring doors. A full-size cardboard door template or a temporary installation can reveal interference before drilling. |
| Cabinet construction | Identify whether the cabinet is frameless or has a face frame, and whether the door is full overlay, partial overlay, or inset. | These details determine the hinge arm and mounting-plate arrangement. A hinge advertised for a wide opening is not automatically suitable for every cabinet construction. |
| Door thickness | Measure the door thickness and check it against the hinge’s approved range. | Confirm that the hinge cup and fixing screws will fit without breaking through the door face. Do not select a cup depth or screw length without checking the hinge drawing and door material. |
| Cup bore and position | Check the required cup diameter, cup depth, bore-center distance from the door edge, and drilling pattern. | A 35 mm cup is common for European-style concealed hinges, but cup dimensions and drilling positions are not universal. Use the template supplied for the specific hinge. |
| Overlay and reveal | Measure the cabinet side thickness, door width, desired side gap, and door position when closed. | Use the hinge and mounting-plate adjustment chart to establish the required overlay or inset. Verify the reveal with a sample installation before drilling all hinge locations. |
| Mounting plate and fixing | Confirm the plate style, plate height, screw pattern, and available mounting surface. | The hinge arm and plate must be compatible. Check that screws have adequate purchase in the cabinet material and do not interfere with shelves, fittings, or the cabinet interior. |
| Door size and weight | Record door height, width, thickness, material, and weight. | Use the hinge maker’s load and hinge-count guidance for the actual door. Do not assume that every 180-degree hinge has the same load capacity or that a single hinge count suits every door. |
| Adjacent doors and hardware | Check gaps between neighboring doors and the projection of handles, pulls, or other fittings. | Open neighboring doors through their full travel as well. A handle or door edge can collide even when the hinge itself clears the cabinet. |
| Adjustment and final test | Check the available side, depth, and height adjustments, then test the door through its full opening range. | Adjust the reveal evenly and confirm smooth movement without binding. If a stop is required to prevent wall or hardware contact, account for it in the installation plan. |
A 180-degree concealed hinge is useful when a door must swing wide while its hardware stays out of sight. Start by measuring the door thickness, overlay, and cabinet opening. Check the hinge’s required cup depth and mounting position against the material available. A few millimeters matter. Also confirm the stated opening angle; nearby walls or handles can stop the door before it reaches 180 degrees.
Match the hinge rating to the complete door, not just its width. Consider the panel’s weight, height, and material, then follow the hinge maker’s load guidance and required hinge count. For a heavy or unusually tall door, ask a qualified supplier to verify the setup. That step may feel cautious, but replacing torn-out fixings is worse. Check whether the hinge allows adjustment in height, depth, and side-to-side alignment.
Test a sample installation before drilling every door. Use the actual panel and cabinet material, and open and close it repeatedly. Watch for rubbing, sagging, loose screws, and contact with adjacent doors. Then test the full swing with handles fitted. A cardboard mock-up can reveal clearance problems, though it cannot show how the real door will sag. Recheck alignment after several days of use; small shifts are easy to miss at first.
